Products

  • Fabrics: Sizing, Cutting, Hemming

    Cutting:
    We have four finishing options for your fabric order:
    As it comes. We cut around your image, leaving a simply scissor cut, perhaps uneven white fabric border.
    Hem with thread. We can hem your fabric with a choice of black or white thread. See below for information on how this affects the size of your print.
    Cut on the line. We will cut neatly on the edge of your image.

    Sizing For Hemming And Shrinkage:
    We offer either a folded hem (single or two fold dependant on the fabric) which uses a straight stitch, and an overlock hem - which stitches over the edge of your material. Some fabrics will work better with one particular hem type, and won't be compatible with the other - for those you will only be given the suitable option. If you see both options, then it's down to you which you would prefer.

    In regards to the folded hem, we create a small one or two fold hem that typically uses 5 to 20mm of material depending on the thickness of the fabric. So for example you could order 100x100cm, so expect your fabric to be approx. 98.5x98.5cm after hemming (please allow for hem, and on top of that please also allow for shrinkage of min 2%). The thicker the fabric the bigger the hem will be. We have black or white thread that you can choose. On our silk and other light woven fabrics, one hemmed edge will be straight (vertically down the roll) and the other will be slightly rippled. The hemming material allowances are as follows and you need to make your print bigger to accommodate the hem:
    • Light fabrics like silks we use 6-8mm in the hem (2 fold), so width/height will be minus 12-16mm
    • Medium fabrics that fray, we use 15-20mm in the hem (2 fold) so width/height will be minus 35-40mm
    • Stiff/heavy/no-fray fabrics we use 15-20mm in the hem (1 fold) so width/height will be minus 35-40mm
    All of these measurements are approximate and can vary. Including with shrinkage it can mean a fairly significant difference to ordered dimensions so please plan your print accordingly. Depending on how open the weave is, our fabric can shrink anywhere from 2% to 8% with the average being 2.5%.

  • How to care for your Fabrics

    Caring for your fabrics is easy, if you follow our simple instructions!


    All our fabrics come with standard International Laundry Icons, detailing how to wash and care for your fabrics. Need help understanding what all those symbols mean? Check out our simple chart!  

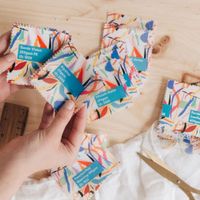
  • Position a design on a folded label?

    You can position your designs on your fabric labels as you wish however here are a few words of caution:

    • The design interface shows dashed lines on all labels. They are representing where you normally stitch your label onto your garnment. These are only indicative to help you place your designs and match your needs.
    • In the case of a folded label, once you click on "Preview and Buy" the interface will show you the back and the front of your label as well as the dashed stitching lines. Make sure to double check your design is placed and potentially rotated in case this is of importance.
    • Tip: print your design or cut a piece of paper the size of your label and fold it to make sure the design interface and your prototype look the way you need
    If there is any text on your label, keep in mind that the online preview looks bigger than the end result. Check the ruler at the top and left of the design interface and make sure to keep your text big enough. Printing on fabric will always look slightly different than on screen or paper.

    See above an example of the design interface (Front and Back) / Preview / finished product. Please note the way the design has been rotated by our customer in this case:

    1. Front of the Label (after selecting the size / Folded or not / Quantity in the "Product Options" tab
    2. Back of the label
    3. Preview after clicking on "Preview and Buy"
    4. Finished Label : Front / Back / Unfolded


    We hope this helps!

    Your Bags Of Love Team

  • Examples of Labels' Do's and Don't's

    Keep your label design clean and bold

    Do not use font sizes under 10pt. 
    Do not use lightweight or fine fonts
    Keep in mind the label size you are producing
    Small labels only have room for a logo. 
    For care labels with lots of instruction text choose one of our larger labels. To get the best labels here are some tips!

  • Fabric : Neoprene 3.5mm

    Please note that High contrast graphics eg black text on a light background, will cause problems on our 3.5 neoprene.


    Large areas of solid colour will also not print well. The best artwork for neoprene are patterns of low contrasting colours with no large areas of solid colour.


    More information on our Neoprene and to start designing your own Neoprene, please click here

    We hope this helps
    your Bags Of Love team

  • How to Fill your Lighter & Replace the Flint

    WARNINGS:

    • Refilling with fluid should be carried out in a well ventilated area on a non-flammable surface.
    • Ensure your lighter is completely cool before disassembling.
    • Do not allow children access to or use of a lighter.
    • Only use appropriate lighter fuel. Petrol, white spirit or methylated spirits should not be used.
    • Lighter fuel should be stored in a cool dark cupboard away from the reach of children.
    • Do not overfill your lighter with lighter fluid.
    • Do not allow your lighter to remain burning for more than 30 seconds, to avoid the casing overheating and causing burns.
    • Use carefully and responsibly.
    To fill your lighter with lighter fluid:

    1: Remove the case. Open the lid, firmly grasp the windcover and pull the lighter from its case. Put the cover to one side.

    2: Turn the lighter upside down, use a paperclip to lift the felt covering the cotton wadding.

    3: Slowly and carefully pour in lighter fluid. When the fluid is visible at the top of the wadding stop filling. Wait for 10 seconds, then repeat. When the cotton remains saturated your lighter is full. If fluid drips out of the bottom you have put too much fluid in. Leave lighter on an in-flammable surface and allow excess fuel to evaporate for 5 minutes.

    4: Push the lighter back into its case, ensuring it is fully inserted. Wipe the lighter and your hands to remove any excess fluid.

    5: Allow your lighter to sit for 2-3 minutes with the lid open. DO NOT STRIKE A LIGHT. This allows any excess lighter fluid on the outside of the case to evaporate.

    6: Test your lighter is working by striking the thumb wheel.

    To replace the flint in your lighter:

    1: Remove the case. Open the lid, firmly grasp the windcover and pull the lighter from its case. Put the cover to one side.

    2: Turn the lighter upside down. Using a small flathead screwdriver unscrew the brass screw counterclockwise.

    3: Remove the screw head with attached spring. Turn the lighter upside down and tap on the top to remove any remaining flint material.

    4: Drop a new flint into the tube. Re-insert the spring and tighten clockwise. Do not over tighten the screw.

    TIP: a spare flint or two can stored underneath the felt.
  • Stitching Patterns

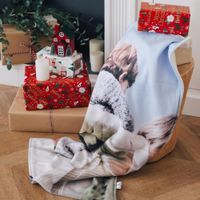
    Due to our maximum print width of 1.5m, larger duvet covers or bed sheets will need to be printed in separate panels and stitched together by our team of in-house experts. Every design or photo is different, so we have devised 4 different stitch patterns you can select. Please choose the one that best suits the composition of your image.

    Please bear in mind that when joining the pieces, there may be some margin of mismatch or loss of image across the seams. We do everything possible to minimise this. If uploading images of people or adding text, try to avoid important details like faces crossing the seam lines, as these will be difficult to align accurately.

  • Install your Clock mechanism

    You should be able to install your clock mechanism and hands easily enough with the card provided in yoru package however if you run into trouble or the card is missing, please follow these instructions. See the above graph.

  • Photo Glass: screw the metal pins


    1. Take the two metal pins
    2. Unscrew the top part
    3. If the screw is not long enough:
      1. Unscrew with your hand
      2. If the screw is too tightly screwed in: use a size 2  Allen Key to unscrew (not provided)
    4. Insert the metal pins into the designated holes on the photo glass and screw them in
    5. Your Photo Glass is ready.

    We hope this helps.
    Your Bags Of Love Team

  • Cushion cover & inner pad size (fit # fill)

    We Make Big 50cm and Medium 40cm square cushions covers which can fit inner pads 60cm and 45cm (to nicely fill the whole cover).


    You can design and buy the full Cushion (cover + inner pad)

    Or you can create and order the Cushion cover only if you prefer.