
Introduction
In today’s world, we capture countless moments on our smartphones, yet many of these digital photos sit forgotten within albums or cloud storage. What if you could breathe life into those cherished memories? A gallery wall is an excellent way to transform your favourite photos into a personalised masterpiece that adds warmth and character to your home. Not only does it create a unique, stylistic showcase of your life, but it also brings with it an emotional touch, reminding you of the moments that matter most. With Bags of Love, making your gallery wall a reality is a breeze. Their range of customisable photo prints, canvases, and frames provides an effortless way to turn your memories into art.
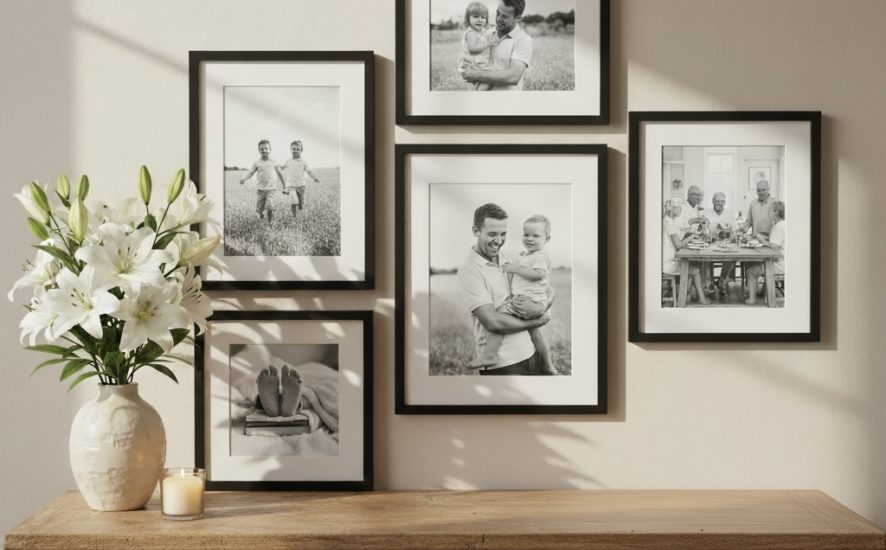
Step 1: Select Your Photos
Before you can start crafting your gallery wall, it’s essential to curate the right selection of photos. Think about:
- Meaningful moments: Choose images from family holidays, special milestones like weddings or graduations, or even everyday moments that bring a smile.
- Themes: Consider having a cohesive theme such as travels, family, or pets to create a relatable story.
- Variety in style: Mix colour photos with brilliant black-and-white images to add depth and interest to your wall.
Once you’ve narrowed down your favorites, you’ll have a solid foundation to build upon!
Step 2: Choose Your Products
The next step is to decide which Bags of Love products will showcase your memories beautifully. Here are some excellent options:
- Prints: Choose vibrant prints for traditional displays.
- Canvases: For a gallery look, canvas prints provide a robust and artistic finish.
- Photo tiles: These offering versatility and can be easily rearranged for a fun, dynamic display.
Don’t be afraid to mix different sizes and shapes for visual interest. A combination of large canvases and small prints can create an eye-catching arrangement.
Step 3: Plan Your Layout
Before putting any holes in your wall, it’s crucial to plan how you want your gallery to look. Consider these tips:
- Measure your wall space: Understanding the dimensions you’re working with will prevent overcrowding.
- Sketch your layout: Using paper or digital tools, create a rough sketch of your design.
- Balance arrangements: Decide whether you want a symmetrical finish or an eclectic mix of personal moments.
Your layout should tell a story and invite viewers in, so don’t rush this step!
Step 4: Printing & Personalisation Tips
Once you’ve decided on the photos and products, it’s time to print. Here are some suggestions to ensure your prints look their best:
- Enhance your photos: Use photo editing software for cropping and applying filters that amplify your images’ qualities.
- Consider captions: Adding dates or small quotes can further personalise your displays and evoke memories.
Bags of Love offers complete customisation options, enabling you to achieve a polished look that you will love.
Step 5: Hanging & Styling
Now that you have your prints ready, let’s get them hung up! Here are some practical tips for a flawless finish:
- Spacing and alignment: Maintain consistent spacing between frames, and use a level for perfect alignment.
- Mockups: Create a temporary arrangement on your floor or use paper templates to visualise before drilling any holes.
- Add creative touches: Incorporate small shelves, mirrors, or wall decals for extra flair.
Remember, this is your gallery, and it should reflect your unique style!
Conclusion
Creating a gallery wall from your own memories is not only a fun DIY project but also a heartwarming way to bring life to your home. Start with a few key memories that resonate with you, and expand your collection over time. If you’re ready to get started, check out the incredible range of products at Bags of Love. Plus, enjoy 10% off your first order! Thousands of customers have transformed their walls with Bags of Love, showcasing their cherished moments in style. Why not join them?