
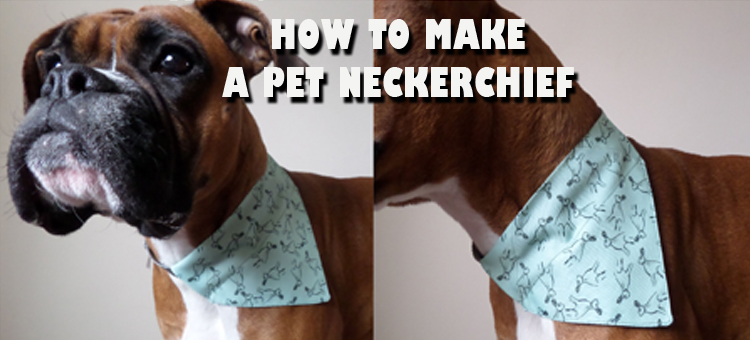
At Bags of Love, we are lucky enough to have some very talented customers, who work with us to create amazing products with their designs.
One such customer is the lovely Charlotte Baker, who runs an adorable website called Made For Mutts. She sells handmade pet accessories, including collars, bedding and neckerchiefs to ensure pooches look dapper! When we saw her most recent order – a gorgeous rabbit print on our waterproof fabric – we decided we had to get in touch with her to let her know, firstly, how much we love her work and secondly, if she might want to work with us to create a tutorial.
We love tutorials and DIY here at Bags of Love. As a company who specialises in handmade, personalised gifts, there is nothing we appreciate more than when people take their time to create unique and beautiful things – whether it is fashion, beauty, accessories, homeware or…in Charlotte’s case, pet accessories!
Luckily for us, Charlotte turned out to be as lovely as her products and agreed to help us create a DIY tutorial to share with our readers and customers! How nice is that?
After a bit of deliberating, we decided to go with a tutorial to make a neckerchief for a dog or a cat. These cute accessories look so stylish and will give your pooch or kitty a really fun look, without making them feel uncomfortable. They are a great alternative to a collar and you can basically design your very own – so it will be unlike anything you can find in the shops.
Charlotte recommends to use our print on waterproof fabric. Simply click here and create a design to suit your pet. You can add their name, your contact number (in case they get lost) or just create a fun and inspiring design, which you love. If you don’t want to create your own fabric, you can pop into any haberdashery and just pick a fabric you love.
This DIY tutorial is easy peasy to follow. We have broken it down into a step by step guide to show you how to make a simple attachable neckerchief for your dog or cat, which slides easily onto their collar!
So, without further ado, let’s get started shall we?
Here is what you will need to create your own DIY pet neckerchief or personalised dog and cat bandanna:
- Scissors
- An iron
- Pins
- Measuring tape
- Printed fabric
- Sewing machine
- Threads and bobbin
Step 1
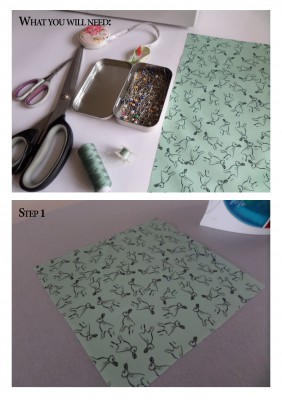
To begin making your personalised dog bandanna, place your chosen fabric on a flat surface and press with an iron to get rid of any creases or wrinkles. In Charlotte’s example, she used our printed waterproof fabric, which she designed online at Bags of Love with her gorgeous hare drawings on a pretty mint green background.
Step 2
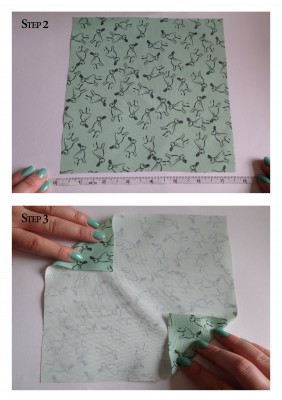
You now need to measure out the preferred size of your fabric, that you would like for your pet neckerchief. To do this, you need to measure the length between the adjustable slider and the buckle, on your pet’s collar. The collar Charlotte used has a length of 8 inches between the buckles, and this is the space in which the neckerchief would need to sit. Charlotte recommends making the pet bandanna slightly small for a more comfortable fit, she she cut her fabric to measure 7.5 x 7.5 inches, as shown in the photo.
Step 3
Now turn your fabric around the other way, so the none printed side is facing upwards. Fold in the two opposite corners, as shown.
Step 4
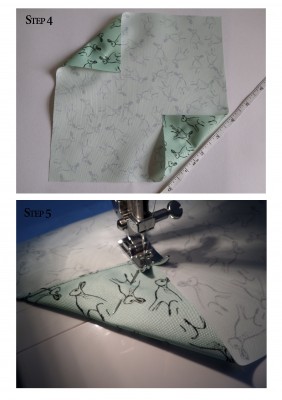
You now need to measure the folded corners accurately! If you are following the same measurements as Charlotte, then she suggests using a fold measuring 4 inches, which allows a collar of up to a 1.5 inch height to slide onto it. You can use pins to hold the fold in place for stitching.
Step 5
Using your sewing machine, or a hand stitch if you are very good, and stitch down the folded corners as close to the edge as possible. This will create a neat finish without compromising any fabric space.
Step 6
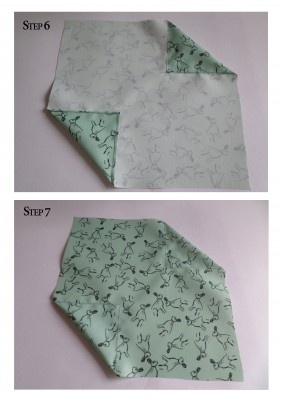
Once you have stitched both corners down, press them lightly with your iron, to make sure the corners are neat and line up when folded.
Step 7
Now turn your fabric the right side up!
Step 8
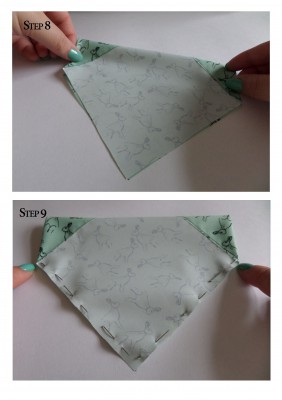
Next you need to fold your fabric in half, so that the points meet symmetrically and you see the unprinted side facing up. Take a look at the photo to make sure you have folded the fabric correctly.
Step 9
You now need to pin the sides together – HOWEVER – don’t pin the sides where your design is facing you, as this will be the gap for your pet’s collar to slide through.
Step 10
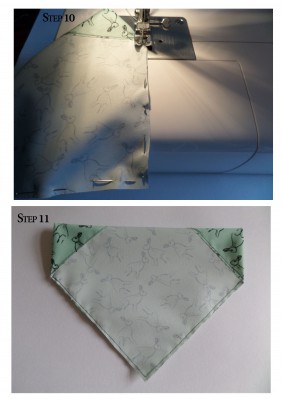
Using your sewing machine – stitch along the line you have pinned, roughly 4mm away from the edge of the fabric.
Step 11
Once you have stitched the sides up, your fabric should look like the pointed part of an arrow – like you can see in the picture.
Step 12
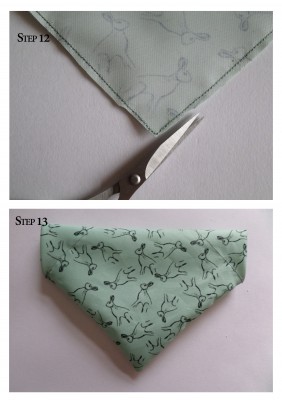
Next, trim the seam and the point of the neckerchief, to make turning the point the “right side” easier. It is best to use a really good, sharp pair of scissors for this to ensure accuracy and neatness!
Step 13
Turn your fabric the right side up by pulling through one of the collar sliding gaps. You need to make sure that the point is fully pushed out and is symmetrical and neat.
Step 14
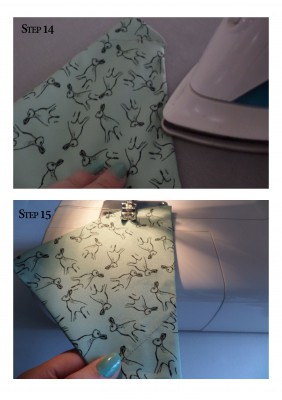
Using your iron, press the fabric lightly so that it is flat. Check that both sides of the DIY pet neckerchief are the same length.
Step 15
Now, stitch along the top of the personalised pet bandanna, leaving the gap for the collar, as shown in the photo. Next, stitch along the sides to create a triangle shape. This will hold the per neckerchief perfectly in place.
Step 16
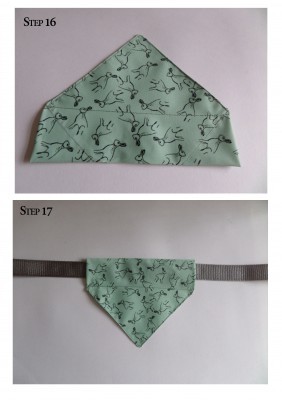
This is how your personalised dog bandanna should look!
Step 17
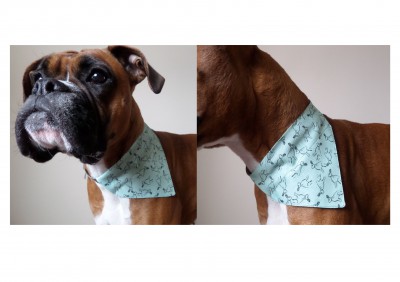
The final step is to slip your pet’s collar through the gaps in the neckerchief, to secure it in place. Charlotte used a simple grey webbing collar, so that the pet bandanna and her stunning print really stood out! Here you can see the final result, modelled beautifully on her gorgeous pooch! The bandanna can be worn along the base of the neck or at the side. Whatever you, and your model, prefer!
We hope you enjoyed our DIY pet bandanna tutorial! We think they look fabulous and really show off both your and your pet’s personality.
If you would like to see what other gorgeous pet accessory goodies Charlotte has on offer, you can visit her website here. You can also follow her on Instagram, Twitter and Facebook.
Thanks to Charlotte for sharing her creativity with us. If you fancy making a personalised pet neckerchief of your own, make sure you send us a photo of the finished result! You can post it on our Twitter or on our Facebook page.
Stay tuned to the blog for more fun and easy DIY tutorials coming soon!